
One occasionally gets tired from eating the same old boring food, and hence it is human to desire something different hence some people resort to barbecue. Most often, People use wood for barbecue, and sometimes the wood gets destroyed due to exposure to too much heat. This is where a Smoker Box comes into use.
What is a Smoker Box?
A smoker box is a removable container that contains smoking chips. It has a perforated surface for the smoke to rise and subsequently enter the main cooking chamber. It does not allow too much heat to enter the cooking compartment, which ensures proper cooking of food.
Now that we know about the benefits of a smoker box, the question arises of how to use it properly. In this guide, the detailed manual on how to use a smoker box will be discussed.
Contents
- How to Use a Smoker Box:
- Step 1: Buy or Create a Smoker Box:
- Step 2: Preheat the Gas Grills:
- Step 3: Prepare the Smoker Box for Use:
- Step 4: Allow the Smoker Box to Produce Smoke:
- Step 5: Start Cooking Your Meat:
- Step 6: Cover the Grills
- Step 7: Allow the food to be cooked
- Step 8: Monitor the contents of the Smoker Box:
- Step 9: Devour the Meat
- Step 10: Remove the Smoker Box:
- Step 11: Clean the Smoker Box:
How to Use a Smoker Box:
Below is a step by step guide on how to use a smoker box.
Step 1: Buy or Create a Smoker Box:
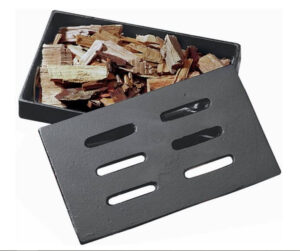
A smoker box is readily available in the markets. It has a solid bottom and a perforated surface to allow the smoke to pass through.
A DIY smoker box can be made easily using an aluminium pan with a holed surface, however using a ready-made smoker box is recommended for accurate results.
Step 2: Preheat the Gas Grills:

While we get our smoker box ready, we need to preheat the gas grills at about 200-250F for about 15 minutes. We have to be careful in the process so that the grills do not become too hot for use. The preheating process is essential to generate smoke properly.
Step 3: Prepare the Smoker Box for Use:
The smoker box is easy to handle and prepare. Since it is detachable, It becomes much easier to administer its usage.
Put any wood chips of your choice in the smoker box, depending on your taste and how you like your meat to be eaten. There is a wide variety of smoking woods available in the market with varying quality and taste imparting ability.
Step 4: Allow the Smoker Box to Produce Smoke:
After preheating the grills, we turn off the heating source or reduce it to a very mild level, and we allow the grills to impart an adequate amount of heat to wood chips in the smoker box to produce smoke for the indirect method of cooking.
Many manuals have instructions for the proper way of attaching the smoker box according to the specifications of the unit.
The smoker box is first attached to the main cooking chamber after turning off or lowering the flame considerably. The entire system is then covered with a lid to make temperature adjustments.
The most desirable temperature is 220-250 F for proper cooking of food; however, it depends on the type of meat being cooked. For chicken, it is much lower, but for meat, it is increased considerably.
Step 5: Start Cooking Your Meat:
Once you achieve the desired temperature, you put the meat over the grills and allow the smoker box to produce smoke so that uniform heat is supplied to all the contents to ensure proper cooking.
Once you place the meat over the grills, be sure to check the heat of the wood chips in the smoker box occasionally and ensure that the smoke is being produced.
Step 6: Cover the Grills
It is extremely important to cover the entire unit containing the smoker box and the grills containing the meat with a lid, so the heat stays inside the cooking chamber and does not leave the system. Otherwise, all the heat would be lost in the air, and there would be absolutely no use in employing such a fancy method of outdoor cooking. Therefore, covering the grills with a lid.
Step 7: Allow the food to be cooked
Now the thing which holds an insane amount of importance is patience while cooking using the indirect heating method.
Chicken requires barely 20 minutes at 225 F to be ready, however meat requires a much larger fraction of time, as much as 1.5-3 hours at 250+ F. Therefore, we need to be patient in order to get good results, and at the same time, we have to be keeping a check on the condition of the wood chips.
Step 8: Monitor the contents of the Smoker Box:
Since the entire focus of this cooking method revolves around the provision of smoke, we continuously need to monitor the wooden chips if they are producing an appropriate amount of smoke or not. If yes, then we are good to go. If not, we have to add more wood chips to ensure the proper production of smoke for adequate cooking.
Step 9: Devour the Meat

Generally, there is no proper method to check if the meat is done or not apart from checking its texture with a fork. Once the meat looks and feels a certain way, it is most probably ready to be devoured.
However, sometimes a little more cooking is needed. So it is better to take a small fragment, allow it to cool for some time, and then taste it to determine its quality.
Take out the meat once it is done and enjoy special smoked meat.
Step 10: Remove the Smoker Box:
It is very important to remove the smoker box from the compartment in order to use it later. It is advisable to discard the wooden chips after use. However, if they are still in a usable condition, it is better to keep them for later use.
Step 11: Clean the Smoker Box:
In order to increase the durability and lifetime of your smoker box, you have to clean it immediately; otherwise, coal will deposit over it over the course of time, degrading its quality and, subsequently, deteriorating its condition.
A smoker box can be cleaned using soapy water and a hard bristle brush and gently scrubbing it. The residuals of wood come off easily. It is advisable not to use a metal scrub for cleaning as it can scratch the surface.
This was the entire detailed process on how to use a smoker box. Happy Cooking!
Our Buyer’s Guides